
French Follows!
The idea of this article is to show how to use Python in Houdini for the creation of SOP node. In order to follow this short tutorial you should know basic of Python as well as Houdini ( SOP nodes, digital assets création ... ).
You can find a ready to go otl Here, and you can download the python source code Here.
We're going to create an otl via Python which will be able to return in a point attribute the value of the angle between each edges of a ordered curve.
I insiste on that point, the curve must be ordered ! that means points order must follow the direction of the curve. To order curve's points you have multiple possibilities like sort node, nurbs UV, pathfinding etc. This might be the subject of another article later on.
This tool could be created throught vex or with normal nodes of houdini, but the point of this tutorial is to show how python works in Houdini :)
There are multiple ways to use Python in Houdini, here, we'll create a SOP node by Python.
First, we'll create that node, which is actually nothing else than a digital asset. Use the menu "File => new operator type", then select type: "Python" and "Geometry node" ( it means "SOP node" actually ).
Don't forget to put a name an label just like an normal digital asset.
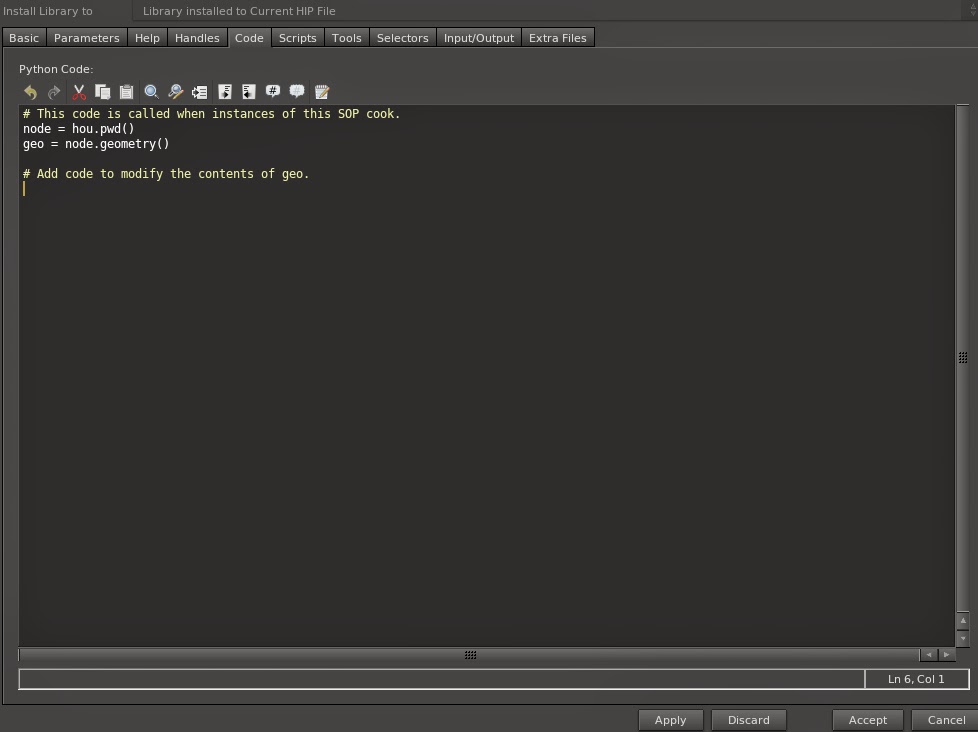
A window similar to digital asset création opens, the difference is that the tab "Code" is available. This is where we will write our code.
You can see that Houdini write for us a bit of starting code :)
# This code is called when instances of this SOP cook.
node = hou.pwd()
geo = node.geometry()
# Add code to modify the contents of geo.
Houdini write what is needed in order to fetch the geometry and the node you need.
node = hou.pwd() => creates a reference to the current node ( our otl )
geo = node.geometry() => creates a reference of the geometry of the current node, this is where you can modify the actual geometru ( points, vertex, prim etc. ).
We will create also 2 parameters:
One float called "threshold" with a range from 0 to 180 and a default value at 120.
One String called "groupname", with a default value "anglegroup".

You can download the source code here, we'll have a look on that line after line:
First of all, we import all the python modules needed. You can import you custom modules as well, as long as they are saved in a folder scanned by Houdini.
import math
import numpy
As seen, we create here a reference to the current node, as well as the current geometry
The line "points = geo.points()" returns a list of all points in the current geometry.
node = hou.pwd()
geo = node.geometry()
points = geo.points()
Here we save in a variable "_threshold" the value of the parameter "threshold" exposed in our UI.
_threshold = node.evalParm("threshold")
Then we create a point group, empty for the moment and which will have the name found in the parameter "groupname".
grp = geo.createPointGroup( node.evalParm("groupname"))
We create an attribute type point which will have as name "angle" and as default value -1.0. This will allow us to save, for each points, the value of the angle found. For points which won't have angle values the attribute value will be -1.0. ( We will see later on that it's in fact, extremities of the curve)
attr = geo.addAttrib(hou.attribType.Point, "angle", -1.0)
It's here that we start to compute the angle value for each edges. We have to compute the angle between each vector 0 => 1, 2 => 1, 1 => 2, 3 => 2 etc...

Let's do a bit of math ! We have 3 points p0, p1, p2, the vector v0->1 will be compute as followed:
vx = p0x - p1x
vy = p0y - p1y
vz = p0z - p1z
Where p0x is the position.x of the point 0 etc.
For each points of the curve, we will use the current point ( i ) and also the point before ( i-1 ) and the point after ( i+1 ) on the curve.
So we will start the loop at 1 in order to skip the first point ( which is the point[0] ) and ends it at (length of the list -1) in order to skip the last point:
for i in range(1, len(points)-1):p1 = points[i-1]
p0 = points[i]
p2 = points[i+1]
Using the method Hou.Point.attribValue(name) we can access to the position values of each points. As the attribute is a vector(x,y,z) we can fetch each values separately for each points:
p0x = p0.attribValue("P")[0]
p0y = p0.attribValue("P")[1]
p0z = p0.attribValue("P")[2]
p1x = p1.attribValue("P")[0]
p1y = p1.attribValue("P")[1]
p1z = p1.attribValue("P")[2]
p2x = p2.attribValue("P")[0]
p2y = p2.attribValue("P")[1]
p2z = p2.attribValue("P")[2]
Then we calculate the vector coordinates and put them in a numpy.array()
v1 = numpy.array([p0x - p1x, p0y - p1y, p0z - p1z])
v2 = numpy.array([p0x - p2x, p0y - p2y, p0z - p2z])
Some more math ! The angle between 2 vector in radian is found by:
acos( dot(normalize(v1), normalize(v2)))
In our case the line "v1 = v1/numpy.linalg.norm(v1)" normalize our vector v1.
and "numpy.dot(v1, v2)" returns the dot product of there 2 vectors.
then, "Math.acos(x)" will return the angle in radian where x is the dot product result.
finally math.degrees(x) will convert radian value to degres angle value.
out = math.acos(numpy.dot(v1/numpy.linalg.norm(v1), v2/numpy.linalg.norm(v2)))
out = math.degrees(out)
We save the angle value in the point attribute we created:
points[i].setAttribValue(attr, out)
And as bonus, if the angle found is smaller than the threshold value, we put the current point in the point group we created.
if out < _threshold:
grp.add(points[i])
Et voilà ! Our node is ready to be used ! We could've add some other options like change the threshold test via an option "greater than or smaller than", expose a string parameter for the name of the attribut angle etc.
The node is in the tab menu at SOP level only, ready to go :)
Any questions or comments: contact@guillaume-j.com !
-----------------------------------------------------------------------------------------------------------
L'idée de ce billet est de présenter un peu l'utilisation de Python dans houdini au niveau SOP object. Ce court tutorial part du principe que vous connaissez déjà les rudiments de Python ainsi qu'Houdini (Nodes SOP, création de digital assets etc.).
Vous pouvez trouver ici un digital asset pré-fait, ainsi que le code source python ici.
Nous allons créer un otl en python qui sera capable de retourner dans un point attribute la valeur de l'angle observé entre chaques edges d'une courbe ordonnée.
J’insiste sur ce point: la courbe doit être ordonnée, c'est a dire que les points de la courbe suivent le sens de la courbe elle-même. Pour ordonner une courbe de points qui aurait des points générés de façon aléatoire, plusieur solutions s'offrent à avous: sort node via attribut, nurbs UV, path finder etc. Ceci fera peu être l'objet d'un autre billet sur ce blog.
Cet outil pourrait être créé avec des nodes "normaux" d'houdini et / ou du vex sans aucuns doutes. Mais l'idée de ce billet est bien de voir comment fonctionne Python dans Houdini :)
Il existe plusieurs façons d'utiliser Python dans Houdini, nous allons voir comment créer ici un SOP node custom en python.
Tout d'abord, créer ce fameux node qui sera en faite un digital asset (otl), par le billet du menu File => new operator type.
Selectionnez le type "Python", et également le type "Geometry node" qui correspond au niveau SOP.
N'oubliez pas de mettre un label et un nom comme un digital asset normal et sauver le.
Une fenêtre comparable à la fenêtre de création de digital assez s'ouvre, la différence est que le tab "Code" est disponible, c'est ici qu'on va pouvoir écrire le code Python.
Vous pouvez d'ailleurs voir qu'on code par défaut a été écrit:
# This code is called when instances of this SOP cook.
node = hou.pwd()
geo = node.geometry()
# Add code to modify the contents of geo.
En effet, Houdini écrit pour nous les bases nécessaires à la création de notre node:

node = hou.pwd() => créer une référence au node courant ( notre otl ).
geo = node.geometry() => créer une référence à la géometry courante, c'est ici que sont fait toutes les manipulation sur la géometrie de notre input, au niveau vertex, points, primitives etc.
Nous allons également créer un paramètre "threshold" en float avec un range de 0 à 180, qui nous sera utile par la suite.
Créez également un paramètre string "groupname" avec en valeur par défault "anglegroup".

Vous pouvez télécharger le code source du node ici. Nous allons détaillé ce code ligne par ligne:
Tout d'abord on importe les modules nécessaires, math et numpy. Vous pouvez ici importer toutes sortes de module, interne à Pyhton ou écrites par vous même si elles sont placées dans un dossier scanné par houdini.
import math
import numpy
Comme vu plus haut, on créer des références au node courrant ainsi qu'à la géométrie courante.
La ligne "points = geo.points()" retourne une liste contenant tout les points de la géométrie.
node = hou.pwd()
geo = node.geometry()
points = geo.points()
Ici nous allons enregistrer dans une variable "_threshold" la valeur de notre paramètre threshold qui sera exposé dans l'interface de notre otl.
_threshold = node.evalParm("threshold")
Nous créer ensuite un group de points ( pour le moment vide ), et qui aura comme nom la valeur de notre paramètre "groupname"
grp = geo.createPointGroup( node.evalParm("groupname"))
A cette ligne nous créons un attribute de type point qui aura pour nom "angle" et comme valeur par défaut -1.0. Cela nous permettra de sauvegarder, pour chaque points, la valeur d'angle que l'ont va trouver dans cet attribute. Pour les points qui n'auront pas de valeur d'angle, l'angle restera à -1. ( Nous verrons plus loin qu'il s'agit en faite des extrémités de la courbe.
attr = geo.addAttrib(hou.attribType.Point, "angle", -1.0)
C'est ici que l'ont commence à calculer l'angle pour chaque edge. Il s'agit de calculer l'angle entre les vecteurs entre les points 0 et 1 et 2 et 1, 1 et 2 et 3 et 2 etc...

Un peu de math ! Nous avons 3 points p0, p1, p2, le vecteur v0->1 sera calculé de la sorte:
vx = p0x - p1x
vy = p0y - p1y
vz = p0z - p1z
Ou p0x est la position en x du point 0 etc...
Pour chaque point de la courbe nous allons traiter le point courant ( i ), mais également le point d'avant ( i-1 ) et le point d'après ( i+1 ) sur la courbe. Nous allons donc faire commencer la boucle à 1 pour ignorer le premier point ( qui aura donc une valeur par défaut d'angle de -1.0) et la finir à la longeur de la liste - 1 pour ignorer également le dernier point de la courbe.
for i in range(1, len(points)-1):
Ici nous mettons dans des variables px les points correspondants.
p1 = points[i-1]
p0 = points[i]
p2 = points[i+1]
Grâce à la méthode Hou.Point.attribValue(name) nous pouvons accéder aux valeur de position de chaque points, comme l'attribut en question est de type vector(x,y,z) nous pouvons récupérer les valeurs d'x, y et z séparéments pour chacun des trois points:
p0x = p0.attribValue("P")[0]
p0y = p0.attribValue("P")[1]
p0z = p0.attribValue("P")[2]
p1x = p1.attribValue("P")[0]
p1y = p1.attribValue("P")[1]
p1z = p1.attribValue("P")[2]
p2x = p2.attribValue("P")[0]
p2y = p2.attribValue("P")[1]
p2z = p2.attribValue("P")[2]
Nous calculons ensuite les coordonnées des vecteurs qui nous intéressent et les mettons dans une variable numpy.array().
v1 = numpy.array([p0x - p1x, p0y - p1y, p0z - p1z])
v2 = numpy.array([p0x - p2x, p0y - p2y, p0z - p2z])
Encore des math ! L'angle en radian entre deux vecteurs est calculé comme ceci:
acos( dot(normalize(v1), normalize(v2)))
Dans notre cas la ligne "v1 = v1/numpy.linalg.norm(v1)" normalise notre vecteur v1.
Puisqu'on utilise le module numpy, numpy.dot(v1, v2) retournera le dot product nécessaire.
Math.acos(x) retournera la valeur en radian en partant d'un valeur x ( généré par notre dot product précédent )
Pour finir, math.degrees(x) convertie une valeur x en radian en une valeur d'angle en degrés.
out = math.acos(numpy.dot(v1/numpy.linalg.norm(v1), v2/numpy.linalg.norm(v2)))
out = math.degrees(out)
Nous enregistrons la valeur trouvée d'angle dans l'attribut "angle" créé précédemment.
points[i].setAttribValue(attr, out)
Et en bonus, si l'angle trouvé est inférieur à l'angle indiqué dans le paramètre threshold, nous ajoutons le point courant dans le group créer au début du node.
if out < _threshold:
grp.add(points[i])
Et voilà notre node est prêt à être utilisé ! Nous aurions pu ajouter d'autres options comme changer le test du treshold via un paramètre ( greater than, or smaller than ), un paramètre exposé pour le nom de l'attribut angle etc.
Votre node se trouve maintenant dans le menu tab si vous êtes en SOP level ! :)
Des questions ou remarques: contact@guillaume-j.com !